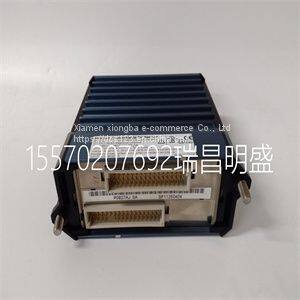
Product Details
Product Description
Product Description
Focus on DCS, PLC, robot control system and large servo system.
Main products: various modules / cards, controllers, touch screens, servo drivers.
Advantages: supply of imported original products, professional production parts,
Fast delivery, accurate delivery time,
The main brands include ABB Bailey, Ge / fuanc, Foxboro, Invensys Triconex, Bently, A-B Rockwell, Emerson, ovation, Motorola, xyvom, Honeywell, Rexroth, KUKA, Ni, Deif, Yokogawa, Woodward, Ryan, Schneider, Yaskawa, Moog, prosoft and other brands
Unpack the switch as follows: 1. Open the box and remove the packing material protecting the switch. 2. Verify that the contents of the carton contains the items listed in the table below. 3. Remove the tape seal on the non‐conductive bag to remove the switch. 4. Perform a visual inspection of the switch for any signs of physical damage. Contact Enterasys Networks if there are any signs of damage. Refer to “Getting Help” on page xvii for details. Installing the Switch on a Flat Surface When installing the switch on a flat surface, the installation of the rubber feet is recommended to prevent the switch from sliding on a flat surface. For instructions to rack mount the switch, proceed to “Rack Mounting the Switch” on page 2‐3. Installing the Rubber Feet To install the rubber feet: 1. Place the switch on its back on a sturdy flat surface to gain access to the bottom of the chassis. 2. Remove the four rubber feet from their plastic bag in the shipping box. 3. Remove the protective strip from the back of one rubber foot and position it on a corner and press firmly into place. Repeat this procedure to install the remaining three rubber feet in the other three corners. 4. After installing the rubber feet, return the switch to its upright position. If a number of switches are being installed in a stack, repeat steps 1 through 4 to install the rubber feet on each switch before continuing with the installation. Item Quantity A4 switch 1 Mounting kit, consisting of two mounting brackets and eight M3x6-mm screws for rack mounting 1 Rubber feet with adhesive backing for installation on a flat surface 4 AC power cord (The type of power cord is country dependent.) 1 DB9 female-to-DB9 female Console Cable 1 Quick Start Guide 1 Note: Do not install the rubber feet if you are going to rack mount the switch. Rack Mounting the Switch Enterasys A4 Fast Ethernet Switch Hardware Installation Guide 2-3 5. Proceed to “Guidelines for Flat Surface Installation” on page 2‐3. For a rackmount installation, proceed to “Rack Mounting the Switch” on page 2‐3. Guidelines for Flat Surface Installation Locate the switch within 182.88 cm (6 ft) of its power source and on a surface as shown in Figure 2‐1 on page 2‐3. If an optional redundant power system is going to be installed and connected to the 14‐pin Redundant Power Supply input connector on the rear of the switch, refer to “Installing and Connecting a Redundant Power System” on page 2‐10. If you are installing several switches in a stack, proceed to “Connecting Stacking Cables” on page 2‐5. If the switch is being installed as a standalone switch, proceed to “Connecting AC Power” on page 2‐9 for power connection instructions. Figure 2-1 Area Guidelines for Switch Installation on Flat Surface Rack Mounting the Switch To install the switch in a 19‐inch rack, you need: • Two rackmount brackets and mounting screws (rackmount kit) shipped with the switch. • Four customer‐supplied screws to attach the switch to a standard 19‐inch rack. Caution: To ensure proper ventilation and prevent overheating, leave a minimum clearance space of 5.1 cm (2.0 in.) at the left and right of the switch. Do not connect the switch to the AC power source until instructed to do so later in the installation process. Precaución: Para asegurar una buena ventilación y evitar que el sistema se sobrecaliente, deje un espacio mínimo de 5.1 cm (2 pulgadas) con respecto a los lados y a la parte posterior del aparato. No conecte el dipositivo a la fuente primaria hasta que no se le indique.
>>
Fashion Color Wool Flat Embroidery Can Be Customized Logo Bobble Hat
>>
Stainless Steel SS301/SS304 Rotary Joint Siphon Elbow For Paper Mill Dryer
>>
Improving Intelligence Intellectual 3in1 Activity Playpen Gym Play Mat with 8PCS Ocean Ball Baby Toys Set with Sound for Age 0m+
>>
Modern Adjustable Cabinet Storage Shoe Closet Shoe Rack for Home
>>
Lightweight Snorkeling Fins Unisex Swimming Frog Shoes Diving Gear Portable Fins
>>
Auto Paper Sticking Machine Line/PVC Sticking Machine/Sticking Machine
>>
Easy Operation Customized dB12070 Single Shaft CNC Drilling Machine
>>
The used TADANO TG700 truck cranes with excellent control performance is for sale
>>
China Factory Direct Sell Diamond Saw Blade Segments Cutting Tools for Granite
>>
honeywell fs20x-211-23-6 Flame Detector
>>
Concrete Rebound Test Hammer price digital Sclerometer Electronic rebound digital concrete test hammer
>>
Fully Automatic Sugarcane Harvesting and Loading Machine Sugarcane Harvester with Cabin
>>
Fresh Vegetable Canned Button Mushroom in Brine
>>
Factory Direct Automatic Tin Foil Cutter Jumbo Roll Aluminum Foil Baking Paper Kraft Paper Insulation Foil Cutting Slitting Rewinding Making Machine Rewinder
>>
10mm Classen Laminate Flooring Waterproof HDF Floor Laminate
>>
multifunctional stainless steel vegetable cutter
>>
Corn Harvester 2 Rowssugar Cane Harvester for Sale
>>
Arched Intelligent Bathroom Anti Fog Mirror Wall Mounted Bluetooth LED Backlit Vanity Smart Mirror with Light
>>
316 Stainless Steel Plate Low Price Stainless Steel Plate Plating Factory Supply 304Stainless Steel Plate
>>
Premium Quality Red Wine Wedding Favor Customise Push Down Aluminum Bar Beer Bottle Opener
